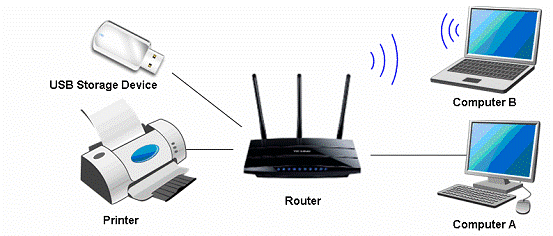
How to setup and share a printer on your local network with Print Server feature on the TP-Link device (MAC OS)
10-16-2014
335745
If your printer has Ethernet port or Wi-Fi function please ignore this article, and contact technical support of your printer's company.
Definition: Print server is a function embedded in your Modem/Router. It allows you to share your printer with computers that are connected to the Modem/Router.
Preparation:
TP-Link Modem/Router with USB port which supports print server function
USB printer and USB cable
Note:
Make sure you have already installed the printer’s driver on your computer. Otherwise, please install it first.
Any computer in your LAN must first install the software if it wants to share the print server via the Router.
Installation - For MAC OS
Step 1
Download the setup software USB Printer Controller Installer_Mac for your modelfrom our website: www.tp-link.com. Go to Support, type in model No. of your device, download it in Utility.
Step 2
Double-click the software you’ve downloaded.
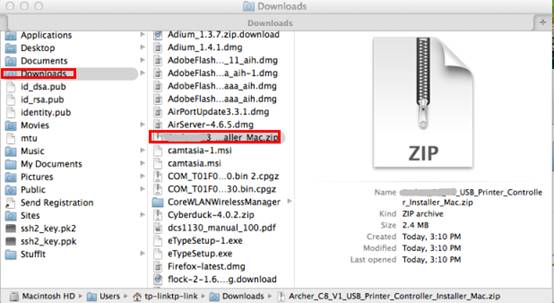
Step 3
Double click on TP-Link_USB_Printer_Controller_Installer_MAC.dmg
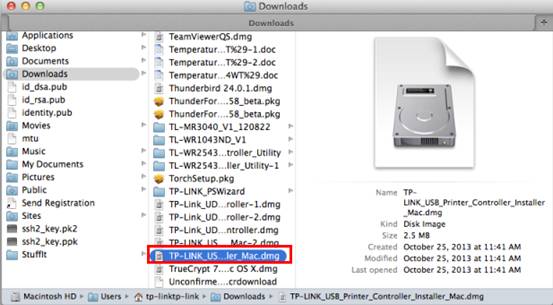
Step 4
Double-click the TP-Link UDS Printer Controller Installer.app in the windowthat pops up
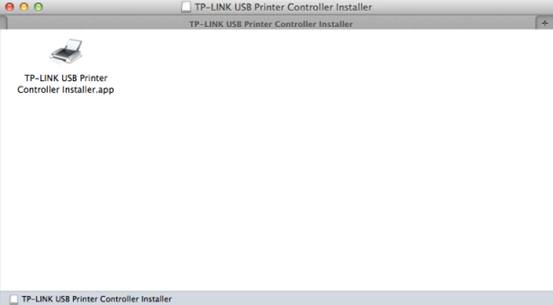
Step 5
Click Install to start the installation process.

Step 6
Click Restart to finish the software installation.

Application
Step 1
Connect the USB printer to the USB port of the TP-Link modem/router,make sure the USB LED light lit up.
Step 2
Double-click the icon to launch the TP-LinkUSB Printer Controller

Step 3
Highlight your printer.

Step 4
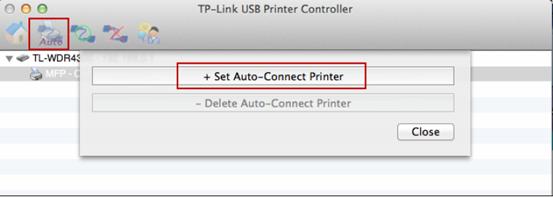
Click the tab Auto-Connect for printing to pull down a list, whereyou can select Set Auto-Connect Printer.
Step 5
Select the printer you would like to set as auto-connect printer, and then click the Apply button.
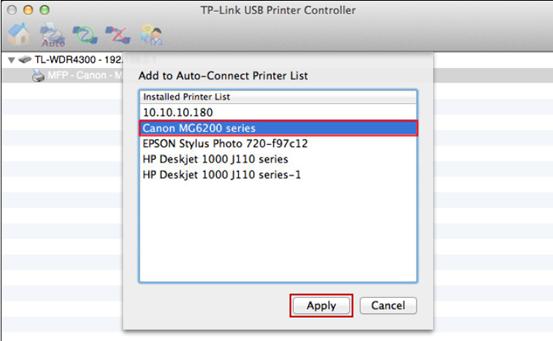
After successful setting, you will see the printer marked as Auto-Connect Printer. You can execute your printing tasks automatically.
