How to apply the Network Sharing USB Settings Function on TP-Link routers?
08-31-2011
130250
|
Step 1
Plug an external USB hard disk drive or USB flash drive into this Router. Then login to the router.
Step 2
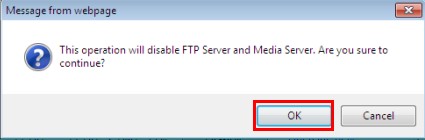
On the left menu, go to USB Settings-> Storage Sharing. Make sure the Service Status is Started and the shared storageis Enabled, if not, please click on Start or Enable. If you cannot see the USB device, please double check the USB device is well plugged, then click on Rescan.
  If you want to physically unplug the USB disk from the router, please click on Eject Disk.
  Step 3
Set the User Accounts.
There is a default item (you cannot delete the item or change the User Name).
Besides, you can click Add New User to add three more items (you can delete the items or change all the selections).
 Step 4
Enjoy Storage Sharing.
You may click on Open the Disk in the router’s page. (This feature only supported on Internet Explorer 8/7/6.)
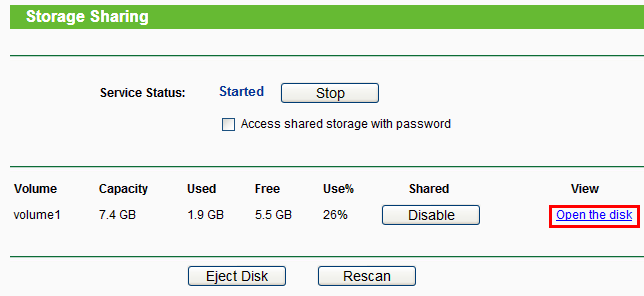 Note: If theService Status is stopped or the shared storage is disabled, Open the disk is not clickable.
 Or you can press Windows logo + R then type \\192.168.1.1 or \\192.168.1.1\Volume ID (for example, \\192.168.1.1\Volume1) in the Run dialog box and press Enter. A window will pop up requiring the username and password, please type in the corresponding username and password configured in Step 3.
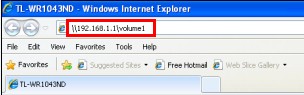  After that, please click OK and you will see the network sharing files of USB device.
|
For how to access to the USB drive via router's Network Sharing function on Mac, please click here.
Get to know more details of each function and configuration please go to Download Center to download the manual of your product.
